
By Todd Free | Owner of Uncarved Block since 2008, former dirtbag, decade-long van-dwelling climber since 1996 and builder of 3 home walls! (updated Jan 2026)
Imagine having a climbing wall right in your home, ready for you to tackle whenever you want. Whether you're aiming to get stronger, improve your technique, just have some serious fun or building a wall for your kids, building your own climbing wall is the way to go. And the best part? You can customize it exactly how you want! Let's get started on this awesome project. Photos have been generously supplied by Uncarved Block customers. (Maybe you would rather just buy a pre-made free standing home climbing wall and have it shipped to you?)
Why spend hours driving to a climbing gym when you can have the ultimate workout right at home? A bouldering wall isn't just a workout; it's a full-body challenge that hones your strength, balance, and technique. Plus, it's super fun! With your own wall, you can practice whenever you like, experiment with new moves, and watch yourself improve faster than ever.
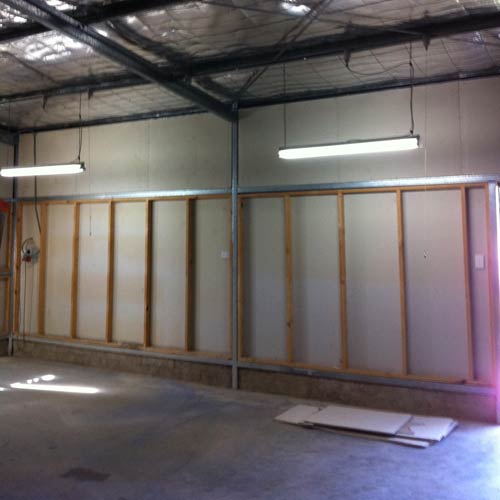
First things first—where’s this wall going to live? Take a good look at the space you have and figure out how to use it most effectively. Is it the garage, the backyard, or maybe a spare room? Measure it out and think about how much room you’ll need not just for climbing, but also for falling safely. If it’s a multi-use space like a garage, think about how you can position the wall to still leave room for your car or storage. Remember, you’ll need to keep access to any doors, windows, and outlets, and don’t forget about lighting and air flow!
|
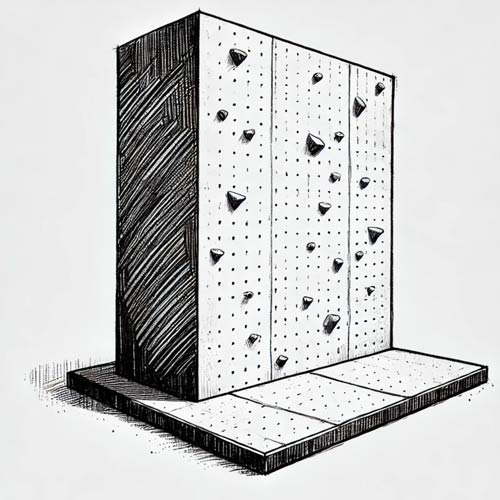
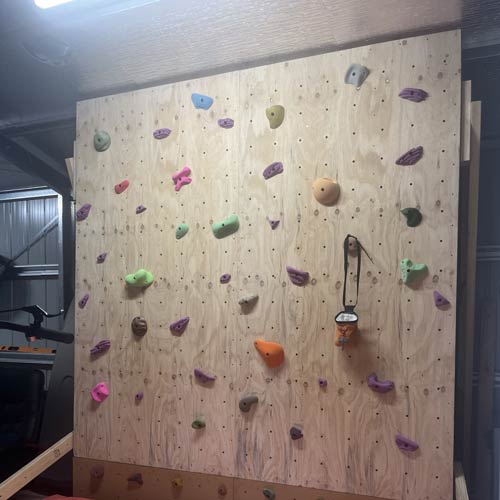
Fit your wall to the space you have if you can. |
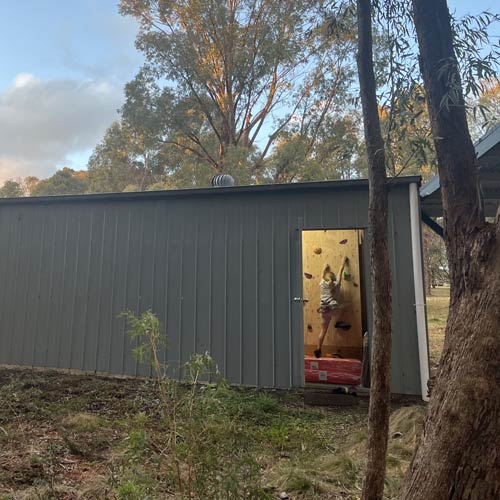
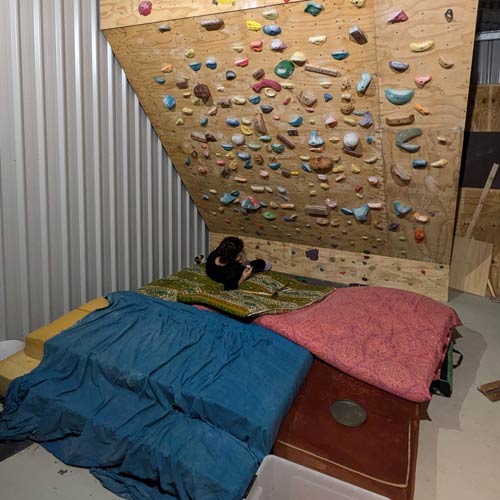
Julia's home wall is in the shed. Fun for everyone! |
Now that you’ve scoped out the space, it’s time to let your imagination run wild. Start by sketching out a few ideas—don’t worry if they’re rough. Play around with different shapes, angles, and sizes to see what could work in your space. Got a few ideas down? Great! Now, think about building a small scale model using cardboard or foam board. This will help you see how your wall will fit together before you start cutting any wood.
|
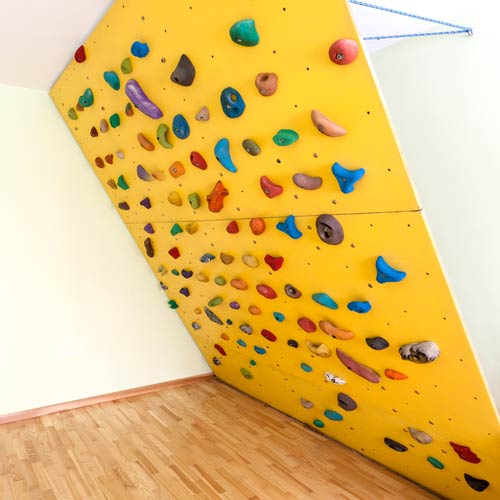
Your wall can be as simple or complex as your budget and space allow. |
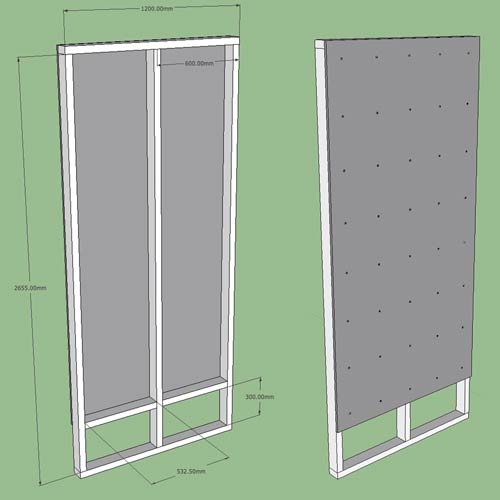
Do not want to sketch on paper, you can use programs like Sketchup etc. |
Remember, some shapes/angles might look cool but can get boring fast. For the best variety in your climbing, overhanging walls between 20° and 45° are your best bet. These angles keep the moves fresh and challenging. Vertical walls are easier to construct, but are difficult to keep interesting and challenging for very long. Ready to bring your dream wall to life? Let’s do it!
Here’s a big decision: will your wall be attached to an existing structure, or will it be free-standing? Attaching your wall to, say, a garage wall can save some time and money since you’ll need fewer support braces. Plus, it’s easier to design. But, once it’s up, it’s not going anywhere—so make sure you’re cool with the location. Also, double-check that your garage (or wherever you’re attaching it) is strong enough to handle the weight and forces of the wall.
|
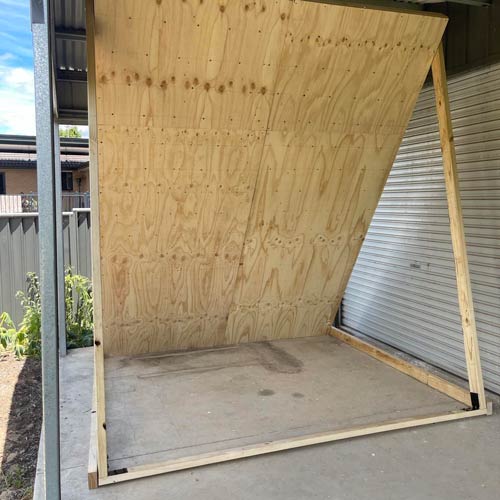
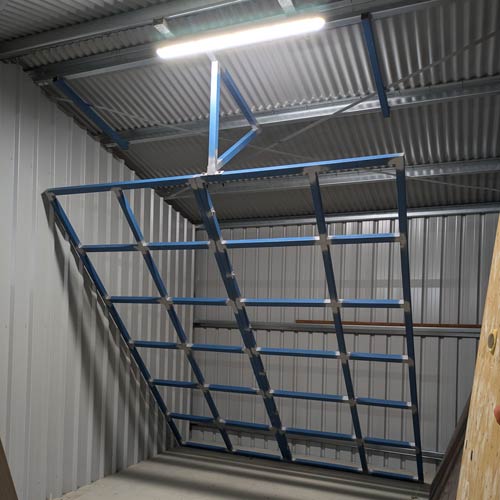
This wall has been designed so that you can easily adjust the angle of the wall. |
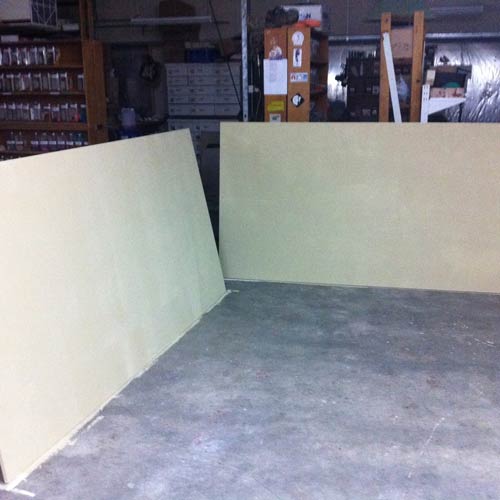
A self supported wall that is not permanent and can be moved easily. |
On the other hand, a free-standing wall is totally movable, perfect if you’re renting or want the option to relocate it later. But, it’s going to cost a bit more and take some extra work to design and build. You’ll need to make sure it’s super stable on its own, which might mean using beefier framing materials and extra bracing. Whichever way you go, make sure it’s solid—this wall is going to take some serious use!
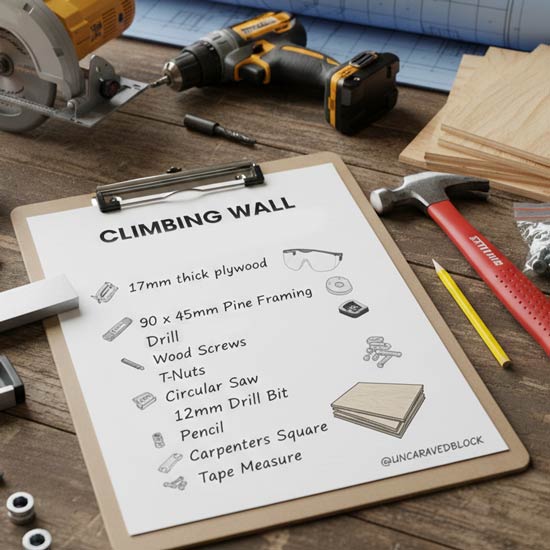
Alright, it’s time to gather your supplies. Start by calculating how much plywood you’ll need—use structural plywood that is a minimum of 17mm thick, which is strong and durable enough for climbing. Structural plywood is about $94 per sheet. If you have the option, design your wall to use full or half sheets of plywood to save time cutting and utilize full sheets to save money. (Prices may vary and updated 2026)
For framing, you will need 90 x 45mm MGP10 ($17.33/2.4m) as a minimum and larger depending on the angles and size of your wall. Steeper walls need stronger materials. You’ll also need a bunch of wood screws (40 & 75mm). Don’t forget tools like a circular saw, drill, drill bits and level to get everything put together just right. Once you’ve got everything on hand, you’re ready to start building your wall!
Let’s get down to business! First, you’ll want to frame each section of your wall separately. Start with the biggest or most important wall section and work your way down to the smaller parts. If your wall isn't too steep (like a gentle 20° overhang), you can build the framework flat on the ground and then hoist it into place—just like putting up a wall in a house.
|
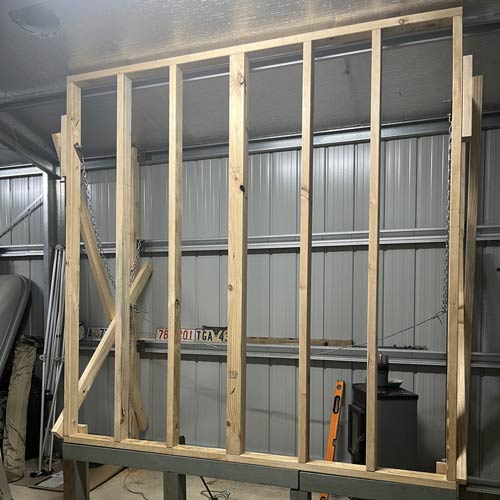
Typical wood framing for a climbing wall. This wall is hinged and the angle can be changed. Thanks, Julia for the picture. |
Typical metal framing for a fixed 40 degree wall that uses the existing structure of a garage. Thanks to Kieran for the image. |
Measure out your top and bottom plates, then attach the vertical studs at regular intervals—about every 400-600 mm works well. Consult with an engineer or climbing wall builder if you are not sure. Make sure everything is square and secure, then screw the framework into your support structure or, if it’s free-standing, brace it well so it stands strong on its own. If you’re building a steep overhang, you’ll need to attach header joists to the ceiling and floor joists first, then frame the wall between them. Take your time here; getting the framing right is key to a solid climbing wall.
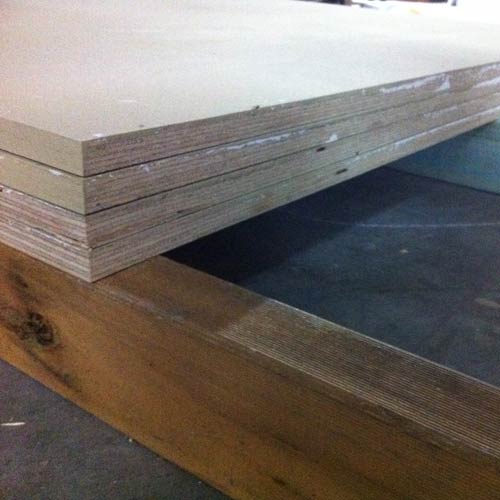
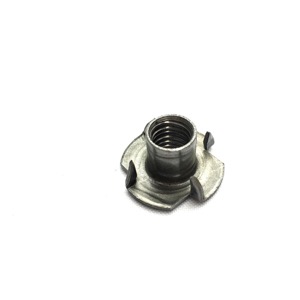
With the framework done, it’s time to add the plywood—the surface you’ll actually climb on. Before you attach it, you’ll want to prep it for climbing holds by installing T-nuts. These little guys are crucial since they’re what your holds will bolt into. Stack a few plywood sheets together, mark out your t-nut placements (about 100-250 per sheet) in a grid or random pattern, and start drilling.
|
Stack your plywood to drill holes through a few sheets at a time. |
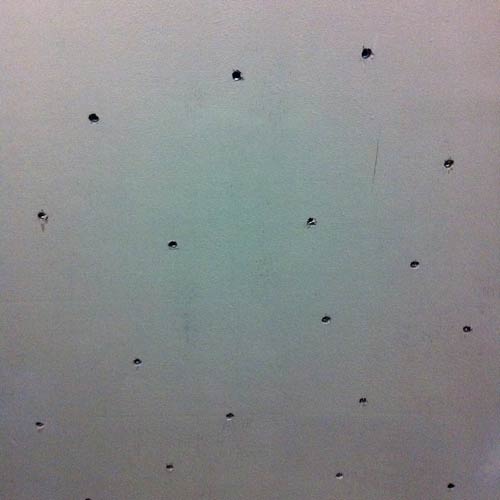
T-nuts installed in a random pattern, grid is an option too. |
Once the holes are drilled, hammer the T-nuts into place on the back side of the wall. Make sure they’re in straight and secure. Now you can attach the plywood to the frame. Use screws approx. every 150-200mm around the edges and along each stud to hold everything firmly in place. Your climbing surface is now ready for action!
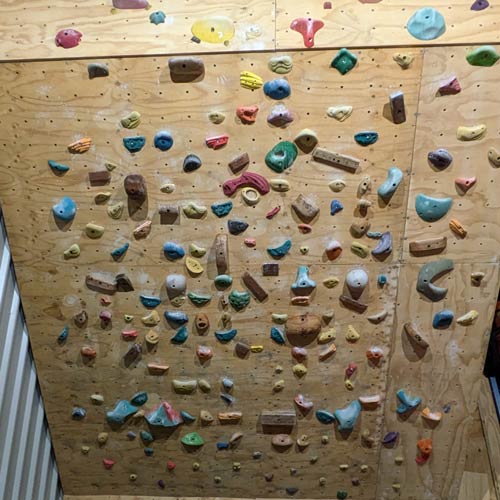
Here’s where your wall really starts to come to life—adding the climbing holds! When it comes to selecting holds, variety is key. You’ll want a mix of medium-sized holds, footholds, and a few jugs for those powerful moves. Aim for at least 5 holds per square meter of wall surface, but feel free to add more as you go. New to climbing? This set will get your hold collection started!
|
Lots of different sizes, types, colour and brands. Kieran even made some of his own wood holds. |
Julia's growing collection of climbing holds on her hinged wall in the shed. |
Start by placing footholds on the lower part of the wall (300-400mm from the bottom of the wall) and you can add jugs at the top for starting and finishing. Use a combination of bolt-on holds for the main wall and screw-on holds for those tricky spots where a bolt won’t work. Mix up the orientation of the holds to create interesting problems—side-pulls, underclings, and straight-down grips all have their place. Now, stand back and admire your handiwork—you’re almost ready to climb!
Now that your wall is up and the holds are in place, it's time to set some problems! This is where you can really get creative. Start by picking a few holds at random and figure out how to link them together. The more variety you use in your moves—sideways, upward, even downward—the more challenging and fun your routes will be.
Don’t be afraid to experiment with different footwork styles. You can set problems where any hold is fair game for your feet, or go for “tracking,” where only the designated handholds can be used as footholds. Mark your routes with colored tape so you can easily remember them and challenge yourself to improve over time. And don’t forget to mix it up every so often to keep things fresh! You can also set problems based on hold color.
Safety is key when it comes to climbing, even at home. Make sure the area underneath and around your wall is well-padded. Never climb over unprotected surfaces like concrete or asphalt, furniture, cars, as a bad fall could lead to serious injury. Your fall zone should extend a few meters past the edges of your wall, particularly if it’s a steep one.
|
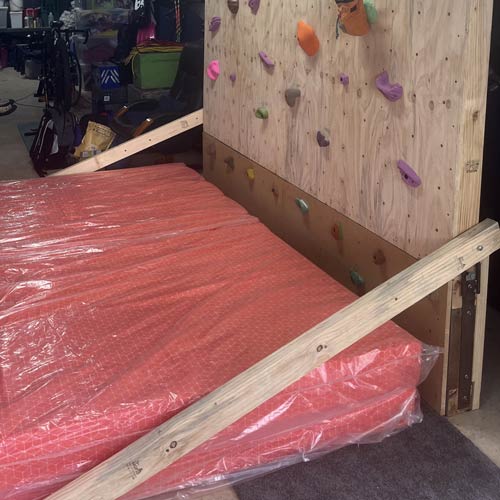
If you have some crash pads, under your home wall is the perfect place to store them. Various foam mattresses can be used as well. Old carpet can be used as a cover. Photo by Kieran. |
Four foam caravan mattresses from Clark Rubber used as padding for this wall, these are 1220 x 1880 x 150 mm and are now covered in canvas. Thanks Julia for the image and link. |
You’ve got a few options for padding, like bouldering crash pads, old mattresses, or layers of carpet padding. Whatever you choose, make sure it’s thick enough to cushion your falls. And remember, you can spin unexpectedly, so always check your padding before you climb to make sure it’s in the right place and in good condition.
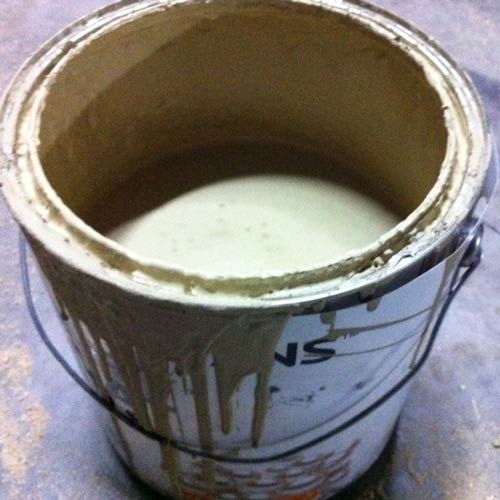
If your wall is indoors, you can leave the plywood as is, but if it’s outside or in a humid spot, a coat of paint is a must to protect it from the elements. Any good exterior-grade paint will do the job. Before you start painting, plug the T-nuts with golf tees or ear plugs or something similar to keep the paint out of the threads, or paint the plwood befoer adding the t-nuts. Textured paint can be expensive but it adds a nice gritty finish to the wall. You can also make your own by adding 1kg of dry sand to a 4L can of paint and mixing well.
|
This plywood was painted before t-nuts installed, but can be done after too. |
Add 1kg of dry sand to 4L of paint for DIY textured paint. |
Choose a color that inspires you or matches your space. A fresh coat of paint not only protects your wall but also makes it look awesome. Once the paint’s dry, you’re ready to start climbing! At most hardware stores, you can find lots of paint that people have changed their mind about for sale at very good discounts—you just can't be picky about the colors!
With your wall up and running, regular maintenance is essential to keep it safe and fun. Start by checking the holds regularly. Make sure they’re tight. Holds can loosen quickly, especially in new walls or after temperature changes, so keep an eye on them.
T-nuts can sometimes spin in the plywood or get cross-threaded. If a T-nut is giving you trouble, try prying the hold slightly away from the wall to loosen the bolt. If that doesn’t work, you might need to cut the bolt with a hacksaw. For any damaged T-nuts, knock them out and replace them, or reinforce them with epoxy or screws. Regularly check all bolts, screws, and joints for wear and tear, and look out for any signs that your wall might need reinforcement. Eventually you will most likely want to clean your holds to remove chalk and rubber.
Your wall is built, the holds are up, and the problems are set—now it’s time to climb! Having your own climbing wall is a game-changer. It’s not just about getting stronger or better at climbing; it’s about having a place to challenge yourself and have fun, any time you want.
But remember, it’s easy to get carried away with such easy access. Be sure to warm up properly and give yourself plenty of rest between sessions to avoid injuries. Balance your climbing with exercises for the opposing muscles to prevent imbalances. With smart training and proper care, your new wall will help you reach new heights, both literally and figuratively. Enjoy the climbing!
Do you need a climbing wall Designer or Builder? Download a PDF on How to build your DIY Climbing Wall
About the Author Todd Free is the owner and lead shaper at Uncarved Block. With over 18 years of experience in the climbing industry, Todd has designed a few holds and helped hundreds of climbers set up their dream home training spaces. Have a question about your build? Contact Todd: 0444 522 631

Add your favourites to cart

Select Afterpay at checkout

Log into or create your Afterpay account, with instant approval decision

Your purchase will be split into 4 payments, payable every 2 weeks
All you need to apply is to have a debit or credit card, to be over 18 years of age, and to be a resident of country offering Afterpay
Late fees and additional eligibility criteria apply. The first payment may be due at the time of purchase
For complete terms visit https://www.afterpay.com/terms